
A correctly executed system window and door install follows six controlled stages — opening survey, frame set and level, shim/anchor, perimeter seal, glazing/panel hang, and commissioning — with typical residential tolerance of ±2 mm on plumb and level for aluminium and uPVC units [S3].
Stage 1 — Opening Survey and Substrate Acceptance
Measure the structural opening at three points horizontally and three vertically; record the smallest dimension as the working tolerance against the system window manufacturer's clearance table (typically 8–15 mm per jamb for residential units) [S3].
Pull a 2 m straightedge across the reveal — deviation greater than 5 mm over 2 m fails acceptance, and the opening must be levelled with a packer or render before the frame is offered up, because twist in the aperture will transfer directly into the sash-to-frame weather seal gap [S2]. Substrate moisture below 12% (Protimeter scale) and a continuous damp-proof course (DPC) at sill are required before any frame is fixed on a masonry reveal [S3].
Stage 2 — Frame Set, Plumb, and Shim Strategy
Lift the frame into the aperture dry, support on load-bearing shims at sill corners and at each mullion, then drive the frame to plumb using a 600 mm spirit level on both jambs and the head — target vertical and horizontal deviation ≤ 2 mm over the full frame length [S2].
Shims must be load-bearing plastic or treated hardwood, never softwood packers that compress under fastener torque; fixings go through the shim, not between shim and frame, otherwise the frame creeps as the packer dries. For an aluminium window and door system, fixings are typically M6 expanding anchors at 600 mm centres and within 150 mm of every corner per PAS 24 guidance, while uPVC systems commonly use polyurethane-foam-and-mechanical-fix hybrids [S3].
Stage 3 — Anchor Pattern, Fixing Torque, and Frame Squaring
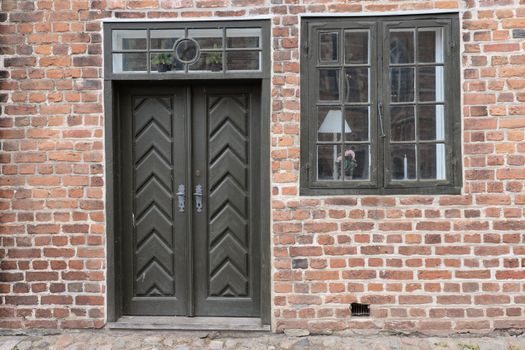
Anchor spacing is the single most-skipped spec on retrofit installs: the table is 600 mm centres for aluminium and 400–600 mm for uPVC, with a fixing within 150 mm of every corner and within 100 mm of every mullion/transom junction [S3].
Torque control matters — over-torquing an M6 anchor to > 8 N·m on a hollow aluminium profile bows the outer wall and locks in stress that later shows as diagonal cracking at the corner cleat; under-torquing leaves the frame free to rack under wind load and breaks the EPDM gasket compression set. Re-check diagonal measurements corner-to-corner after the last anchor; a delta greater than 2 mm means the frame has racked and shims must be reset, not forced [S2].
Stage 4 — Perimeter Seal: Backer Rod, Membrane, and Wet Seal
The seal joint is built in three layers: closed-cell PE backer rod sized 25% larger than the gap, a weather-tight breather membrane on the outer perimeter, and a neutral-cure silicone or impregnated foam tape on the inner perimeter — never single-component acrylic in a moving joint [S3].
Joint width-to-depth ratio should sit at 2:1 (width twice the depth); a 10 mm joint therefore needs 5 mm silicone depth, and a 3 mm joint is below the workable minimum for silicone and should be re-packed. For a fire-rated door assembly, the perimeter gap is filled with intumescent sealant or mineral wool to the door manufacturer's tested detail — deviations here are the typical reason an FD30S door fails its integrity test on site [S3].
Stage 5 — Glazing, Panel Hang, and Hardware Set

Set glass or door panels on setting blocks located at quarter-points of the sill, never at corners — corner blocks lock moisture in and crack the glazing platform. Glazing bead clip-in is checked with a 0.5 mm feeler gauge: any gap means the bead has not seated and must be re-tapped with a nylon mallet, not metal [S2].
For hung door panels, lift onto the factory-fitted hinges, tighten the hinge pin grub screw to the supplier's torque (typically 6–8 N·m for residential hinges), and then make the lock/keep adjustment with the door in the closed position — keep plate shift greater than 3 mm up or down means the frame is still out of square, not the keep [S3]. Compression on the perimeter weather seal should measure 4–6 mm (typical EPDM bulb) when the sash is locked; outside that range, the lock keeps are misaligned.
Stage 6 — Commissioning, Snag, and Handover Acceptance
Final commissioning is a documented pass/fail list, not a glance: plumb/level re-check on both jambs, diagonals corner-to-corner, gasket compression 4–6 mm, hardware operation across the full 90° arc, water-hose test at the head and sill for 5 minutes with no bypass, and ironmongery torque audit on a sample of three fixings per unit [S2][S3].
Hand over the warranty pack with the as-built dimension sheet, fixing torque log, and a 10-year workmanship guarantee in writing — Solihull Windows' published 10-year guarantee and aftercare commitment is the benchmark a residential client should demand, regardless of brand [S3]. Snag items found at handover must be closed within 14 days, because open perimeter gaps let water in on day one and void the system warranty within the first quarter [S2].
Trackable next signal: PAS 24 / Secured by Design revision cycle for new-build ground-floor units, and the post-2025 update to Approved Document Q (security) for any spec change in hinge and lock testing cadence; monitor the British Standards Institution feed for the next amendment. For spec-by-spec comparison of uPVC vs aluminium vs timber on a like-for-like 1200 × 1500 mm opening, see the concrete batching plant types spec map reference methodology — same gate-based acceptance logic applies.