A 12V linear actuator typically pulls between 2A and 12A at its full rated load, with the actual current scaling roughly with mechanical load on the same unit [S4]. A 400 lb-rated 12V model commonly draws 12A at full load, while the same actuator at 150 lb drops to roughly 7A [S2].
No-load current is the lower bound, and can be as low as 1A to 4A on smaller 12V units, while the same model climbs to 12A when it hits rated mechanical load [S1]. The relationship is approximately linear in load (y = mx + b form), so current draw is not a fixed number stamped on the nameplate; it is a function of force, friction, duty cycle, and supply voltage at the actuator terminals [S1][S3].
Why "Rated Amps" on a 12V Actuator Is a Range, Not a Single Number
A 12V DC linear actuator nameplate current is best read as a maximum continuous figure, with the real operating current sliding below that number whenever the load is lighter than the rated capacity [S5]. The 2A to 12A band covers most 12V consumer and light-industrial units, while heavy-duty industrial 12V actuators can exceed 12A under their rated load [S4].
On the manufacturer's published curve, current draw is plotted against load in pounds (or newtons), and the slope of that curve is the actuator's own figure of merit for electrical efficiency [S1]. Sizing a supply from the no-load figure is the single most common mistake integrators make, because the no-load current is the lowest value the actuator will ever pull [S3]. Use the loaded current, or better still, a measured clamp-meter reading on the real mechanism [S3].
Calculating Full-Load Watts and Choosing a DC Supply
For a 12V linear actuator, electrical power at the motor terminals is simply volts times amps: a 12V unit drawing 10A consumes 120W while running [S2][S3]. A 400 lb, 12A unit therefore dissipates about 144W of electrical input at full load, of which a large fraction leaves as heat through the motor housing and gearbox [S2].
The power supply should be sized for the highest current the system may see, with a 1.25x to 1.5x margin over the loaded running current [S3]. For a single 12A 12V actuator, that translates to a 15A to 18A supply, and two actuators that may run together sum their currents before the margin is applied, e.g. 2 x 8A = 16A running, then target about 20A from the supply [S3]. A regulated 12V supply is preferred on long wire runs or where the actuator is paired with logic-level controls, because an unregulated supply's voltage sags under load and the actuator will draw more current to compensate [S7].
Startup Surge and Stall Current: Where Sizing Goes Wrong

Startup current on a brushed DC gear-motor can briefly spike to 5x the running current, so a 5A continuous-rated 12V actuator may pull 25A or more for tens of milliseconds at each direction reversal [S5]. A 5A supply chosen to match the running figure will instantly shut down on that surge, which is why engineers routinely spec a 20A supply for a 5A continuous load [S5].
Stall current is the upper bound and is set by motor winding resistance at zero RPM; it is the current you would measure if the actuator rod were mechanically jammed at end of stroke. A 12V, 5A continuous-rated actuator can draw 25A or more at stall, which is why a properly fused branch and a current-limited motor driver matter as much as the supply rating [S5]. Two actuators on one supply should not be commanded to start simultaneously, because the simultaneous inrush can compound the surge and trip a supply that would otherwise ride through a single-axis start [S5].
12V vs 24V Actuator: How Voltage Choice Reshapes Amp Draw
A 12V linear actuator and a 24V linear actuator of the same mechanical class will draw different currents for the same load, because power in watts is the same physical output but the current halves when voltage doubles. A 24V actuator therefore draws roughly half the current of an equivalent 12V unit at the same load, which means thinner wires, less I²R loss, and lower voltage drop over long cable runs [S4].
The trade-off is that 12V actuators are favored in battery-powered and portable systems where 12V battery architecture is already in place, accepting the higher current as the cost of staying on a single 12V bus [S4]. For a deeper look at the electromechanical trade-offs, the linear actuator encyclopedia entry covers the lead-screw, ball-screw, and belt-driven variants in detail. Where the application needs a position feedback signal, the higher-impedance control lines of a 24V system tend to integrate more cleanly with PLC analog and encoder inputs [S4].
Selection Criteria: Match the Actuator to the Load and the Supply
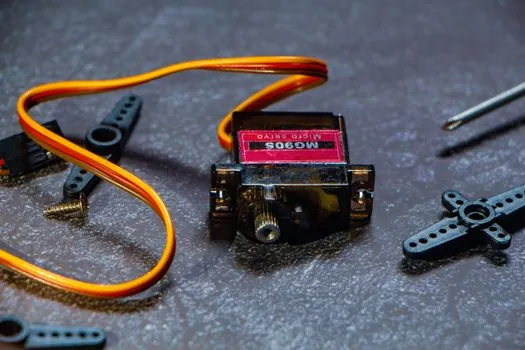
Use the four-step check below to land on a properly sized 12V linear actuator and supply pair, and to reject combinations that look fine on paper but will trip on the first cycle. [S3]
1) Force margin. The mechanical load should sit at 50% to 75% of the actuator's rated dynamic load, so a 400 lb rated unit is the right pick for a 200 lb to 300 lb working load; running at the rated maximum is what puts the motor into continuous high-current draw and shortens brush life. 2) Current measurement. Measure the actual current with a clamp meter on the real mechanism at full load, not on a bench with no fixture. 3) Supply headroom. Apply the 1.25x to 1.5x margin, then check the supply's surge rating, because most generic 12V supplies will not deliver 1.5x rated current for even 100 ms [S3]. 4) Wire and fuse. For higher-current 12V runs, the wire gauge and the inline fuse must both be rated for the full-load current plus surge, and the fuse should sit just above the locked-rotor current to protect the wiring without nuisance tripping [S5].
For sensor feedback on the driven load, a draw-wire sensor mounted along the stroke is the most common way to close the position loop on a 12V actuator that has no built-in encoder. Where the actuator drives a hinged access panel, the hinge-side load profile is non-linear and the inrush at the start of opening can briefly exceed the steady-state figure by a wide margin, which is why a soft-start controller is worth its cost on cabinet-door and similar low-duty-cycle applications [S5].
Common Sizing Mistakes and Verification Method
Three failure modes dominate field returns on 12V linear actuator systems: a supply sized from no-load current, a supply that rides on its surge limit, and wire gauge that drops voltage below 11V at the actuator terminals under load [S3]. The first shows up as the actuator stalling at the end of stroke because the supply has current-limited; the second shows up as random resets or brownouts when two actuators start together; the third shows up as the actuator running slower than its rated no-load speed even with the correct supply [S3].
The verification method is straightforward: place a clamp meter on the positive lead, command the actuator to its rated load, and read both the steady-state current and the inrush on the first 100 ms. Compare those readings to the supply's continuous and surge ratings, and to the wire's ampacity tables. A working system typically shows a steady-state within 10% of the manufacturer's published full-load figure and a surge that decays inside 200 ms [S1][S3].
Watch for two follow-on signals over the next quarter: tighter integration of 12V brushless DC actuators into PLC and IoT control loops, and a migration of new 24V designs into mid-range industrial builds where wire savings outweigh the cost of a second voltage rail. The relevant standards remain the manufacturer's own published performance graphs rather than any single external rating document [S6], and a sanity check against an electronic load bench set-up is the fastest way to confirm the supply's actual surge capability before committing to a 12V system in the field.
Related analysis: CE-to-NFPA 79 export: what actually changes on a machine.