
Fire hydrant bonnet bolt torque is not universal: Mueller Centurion instructions specify 40–80 ft-lb, with the hold-down nut tightened to 200–300 ft-lb after the bonnet bolts are tight [S1].
The required value depends on the hydrant model and assembly, so the correct reassembly procedure combines the applicable OEM manual, even tightening, correct gasket or O-ring seating, and controlled torque-tool calibration.
Model-Specific Bonnet Torque Values
Reassembly torque must come from the manual for the installed hydrant, because published values differ by model and assembly.
M&H Style 929 RELIANT instructions call for bonnet bolts to be retightened to 50 ft-lb during reassembly [S2].
Other procedures specify a minimum rather than a range. A United Water Products installation guide directs installers to leave the bonnet bolts not fully tightened during initial positioning, then tighten the hold-down nut to 200–300 ft-lb before completing the bonnet-bolt tightening sequence [S4]. An installation procedure for another hydrant specifies even tightening of bonnet bolts and nuts to at least 75 ft-lb [S6].
How to Choose the Correct Reassembly Torque
Identify the hydrant model, manual revision, and replaced component before assigning a torque value. The Mueller manual covers Centurion, Super Centurion 200, and Super Centurion 250 models, but it also distinguishes legacy sealing arrangements: early Centurion and pre-2011 Super Centurion 200 hydrants use flat gaskets where later configurations use O-rings [S1].
Use the manufacturer procedure rather than averaging values from different hydrants. A comparison of the available instructions shows why this matters: Style 929 RELIANT instructions call for retightening bolts to 50 foot-pounds of torque, while one installation procedure calls for tightening bonnet bolts and nuts evenly to a minimum of 75 foot-pounds of torque. These values describe different equipment or procedures and cannot be treated as interchangeable.
The fire hydrant nameplate, casting marks, operating manual, and work order should be checked for model identity. If the model cannot be established, the safe engineering action is to stop before final tightening and obtain the applicable OEM instruction rather than select a torque from another hydrant.
Bonnet Seal and Hold-Down Sequence
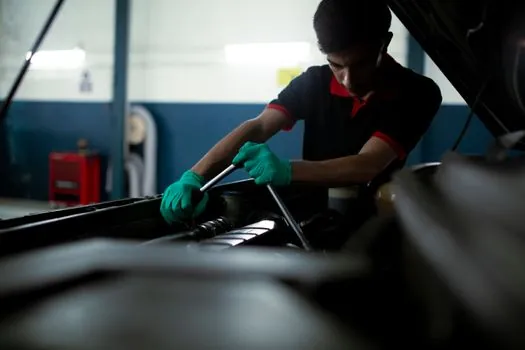
Torque application begins with correct seal placement, not with maximum fastener tension.
The M-94 parts list identifies the bonnet as ductile iron, the bonnet seal and square ring as rubber, and the hold-down nut as bronze [S5]. It also lists the bonnet-to-revolving-nut O-rings as two rubber rings and the revolving nut as bronze. These material and part-count details help distinguish the assembly being serviced.
For the United Water Products dry-barrel sequence, the bonnet and bolts are reinstalled without full tightening, the hold-down nut is tightened to 200–300 ft-lb, and bonnet-bolt tightening follows [S4]. That order is specific to the documented procedure. Other models may require the bonnet bolts to be brought to their specified torque before the hold-down nut is finalized, as shown by the Centurion instructions [S1].
Cross-Fastener Pattern and Tool Control
Bonnet fasteners should be tightened evenly rather than fully tightened one at a time. The 75 ft-lb installation procedure explicitly calls for bonnet bolts and nuts to be tightened evenly to a minimum of 75 ft-lb [S6]. A star or cross-pattern limits uneven clamp load across the bonnet flange, but the pattern must not conflict with the OEM sequence for the hold-down nut.
Use a calibrated torque wrench that covers the selected value with suitable resolution. A 50 ft-lb target should be reached without treating it as permission for extra turns.
Fastener condition matters alongside tool accuracy. Replace distorted hardware, check threads and seating surfaces, and apply the lubricant specified by the manufacturer where required. M&H Style 929 identifies 50 ft-lb as the bonnet-bolt retightening value [S2], while Mueller identifies separate ranges for bonnet bolts and hold-down nut [S1].
Safety Isolation Before Bonnet Removal

Isolate and depressurize the hydrant before removing bonnet hardware. Mueller requires the gate valve to be shut off, pressure to be bled from inside the hydrant, and the main valve opened during the documented procedure so residual flow can be checked; continuous flow indicates improper isolation and must be corrected before disassembly [S1].
Controlled reassembly cannot compensate for an unsafe shutdown. A bonnet-bolt torque value of 50 ft-lb or at least 75 ft-lb has technical meaning only when the barrel and bonnet are isolated from pressurized supply.
The Metropolitan M-94 maintenance guide identifies a pressure rating of 250 psig and lists the hydrant's parts and materials. The applicable standard revision and local utility requirements should be checked rather than assuming the historic guide captures every current procedural requirement.
Post-Torque Functional Checks
Verify the assembly after the specified torque is reached, because a correctly tightened bonnet can still leak if the seal is damaged, misaligned, or pinched. The M-94 reassembly sequence includes checking for leaks after the bonnet and stem work [S5].
Open the hydrant fully after reassembly and inspect bonnet, hold-down nut, operating nut, and nozzle caps for leakage or abnormal movement. One installation procedure bleeds air by loosening a hose-nozzle cap slightly before opening the hydrant fully, following the bonnet-bolt tightening step [S6].
Document the hydrant model, seal configuration, bonnet-bolt value, hold-down-nut value if applicable, and final leak-check result. This record matters because a service history showing 40–80 ft-lb, 50 ft-lb, or 75 ft-lb minimum without the model and assembly details is incomplete for future troubleshooting [S1][S2][S6].
The next traceable control is the manufacturer’s current manual for the identified model: reconcile its bonnet-bolt sequence with the maintenance record, then verify the torque wrench calibration and complete a full-open leak inspection before returning the hydrant to service.