Air-hardening cold-work grades (AISI A2, A6, D2) develop full martensite on still-air cooling because their alloy content suppresses the pearlite/bainite nose, while oil- and water-hardening grades (O1, W1) need a much faster cooling rate through the same temperature range [S2][S6][S7]. That single metallurgical fact is the reason shops that switch from O1 to A2 routinely see a step-change in dimensional movement, and it is also the reason an air-hardening steel dropped into oil is not a safety improvement, it is a different process.
The warpage ranking seen in practice is consistent: oil- and water-hardening steels carry more stress and distortion than air-hardening grades, with water at the far end of the severity scale [S3]. Plain water against a red-hot edge can warp a part like crazy or fracture it outright, which is why a shop that mis-identifies an unknown steel is told to quench on the slow side first (oil) and re-quench in water only if hardness is missing [S4]. For a deeper primer on the steel families and their quench response, see the tool die steel reference page.
Why Air-Hardening Grades Move Less
Hardness in tool steel comes from forcing the face-centered-cubic austenite to transform to body-centered-tetragonal martensite, and the volume change during that transformation is the physical origin of distortion [S2][S6]. Air-hardening grades carry enough chromium, molybdenum, and vanadium to push the time-temperature-transformation (TTT) curve far to the right, so martensite forms on still air without a liquid quench; the cooling rate is gentler, the thermal gradient through the section is smaller, and the differential volume change between surface and core is reduced [S6][S7]. With O1, the same transformation only completes in oil, and an operator who drops the part sideways can have one face cool a few milliseconds before the other, curling the part measurably [S3].
Quench medium and soak time both govern surface oxidation and scale, but warpage is the parameter that consistently drives a shop from O1 to A2: as a rule, oil and water hardening steels will have more stress and distortion than air harden [S3]. A2 in particular is described by working machinists as tending to warp very little in moderate-section tooling, and it is the default switch-in grade for anyone whose O1 parts keep walking off nominal [S3].
Where Air-Hardening Still Bites Back
Higher hardenability is not the same as zero hardenability risk. Large sections in certain air-hardening grades will not develop full as-quenched hardness unless they are started in oil, a hybrid schedule often called interrupted oil quenching or marquenching [S2]. A shop that buys A2 because it is "air hardening" and then leaves a 100 mm block on a rack to cool can find a soft core even though the surface is hard, and the distortion pattern on that part will not be the gentle, uniform kind promised in marketing copy. The fix is a forced-air fan or an oil start followed by air cooling, depending on grade and section size.
There is also a hard upper limit on section size and alloy selection. D2, with ~12 % chromium and high carbon, is an air-hardening grade that achieves its wear resistance from large primary carbides, and those carbides themselves are a source of anisotropy that can pull a die out of flat on heat treat regardless of quench medium [S7]. A2 behaves better in this respect because its carbide volume is lower, but the shop still has to budget for a finish grind after temper, not before.
Oil-Hardening O1: When the Quench Itself Is the Variable
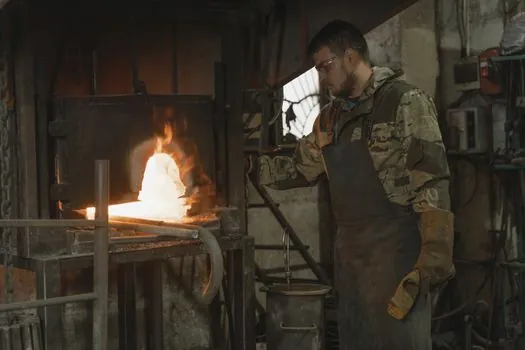
O1 austenitizes at roughly 1450 to 1500 °F (790 to 815 °C); the colour change to a brighter orange above ~1400 °F (760 °C) marks the end of the pearlite-to-austenite conversion, and austenite is non-magnetic, so a shop without a pyrometer can still find critical by watching a magnet let go [S4]. Once at temperature, the quench rate through the martensite-start region is the lever, and oil gives the slower, more uniform rate that O1 needs; water is faster still and reserved for W-series water-hardening steels [S4][S5]. A shop that has been told to use O1 because it is "easier to heat treat" usually discovers, the first time they drop a long thin blade in sideways, that the technique matters more than the grade choice.
The real-world demo, repeated by machinists for a decade, is to plunge the same O1 blank lengthwise into the oil bath and move it back and forth as it cools, then compare it to a blank dropped flat; the agitated quench comes out straight, the still quench comes out visibly curled [S3]. Fixturing and agitation are not optional: if warpage is a real concern, build a treating fixture, and wrap the part in stainless wire with boric acid to reduce scale and decarburization [S5]. The companion process levers, including normalizing before hardening to relieve machining stress, are the same levers that show up in any process control discussion of thermal distortion where temperature uniformity drives final geometry.
Selection Criteria: O1 vs A2 vs W1 vs D2
The four most common cold-work tool steels sort cleanly on four shop-floor criteria, and the answer almost always comes from the largest cross-section that must be hardened and the dimensional tolerance the part must hold [S2][S3][S6][S7]:
Warpage resistance. A2 and other A-series air-hardening grades lead, D2 is close behind, O1 is the worst of the oil-hardening set, and W1 (water-hardening) sits at the bottom of the table because the water quench sets up the steepest thermal gradient [S3][S4].
Equipment needed. A2, D2, A6 need a furnace with an automatic temperature controller and a programmed heat-treat cycle, including a slow controlled cool from the austenitizing soak; O1 and W1 can be done with a torch and a magnet for small parts, though a furnace is still preferred for anything longer than a hobby blade [S2][S5].
Achievable hardness. W1 and O1 typically reach the mid-60s HRC after a clean quench and a 400 to 500 °F temper; D2 lands in the low 60s HRC with secondary-hardening tempers above 900 °F (482 °C) for hot-work or temper-resistance duty; A2 lands in the high 50s to low 60s HRC and is chosen for the combination of wear and dimensional stability rather than peak hardness [S6][S7].
Distortion tolerance budget. If the part must hold ±0.001 in. or less without a finish grind, A2 or D2 is the right starting point and the furnace cycle must be qualified on a sample coupon first; if ±0.005 in. is acceptable and the shop is doing one-offs, O1 with an agitated oil quench and a treating fixture is the lower-cost path [S3][S5].
Process Levers That Reduce Warpage Independent of Grade
Stress relief before austenitizing is the first lever: machining residual stress in an O1 blank can release during the heat to critical temperature and add to the quench shift, so a sub-critical stress relief (typically ~1000 to 1200 °F, below the critical) is recommended for tightly toleranced parts [S3]. Normalizing is a separate step above the upper critical, used to refine grain after hot working rather than to relieve machining stress, and the two are commonly confused on the shop floor; normalizing O1 hot-worked stock above its critical and then air cooling can reduce the directional grain pattern that drives uneven quench distortion [S5].
Pre-heating, especially in two stages (a warm-up around 1100 to 1200 °F before raising to austenitizing temperature), reduces the thermal gradient at the moment of the quench and the corresponding surface-to-core volume-change mismatch that is the direct mechanical cause of warpage [S4]. Boric acid or anti-scale compound on the surface limits decarburization, which itself is a source of dimensional change because the depleted surface layer transforms at a different rate than the core [S5]. For shops running a controlled furnace, a martempering bath (salt or oil held just above the martensite-start, then air-cooled to room temperature) flattens the distortion comparison between O1 and A2 by replacing the violent initial quench with a uniform soak through the nose of the TTT curve [S2].
Failure Modes and What They Tell You
A part that comes out of the oil bath with a visible bow and the same hardness as a straight part is a quench-geometry problem, not a steel problem; the cure is agitation, fixturing, or a switch to an air-hardening grade with the same carbon content [S3][S4]. A part that comes out under-hard at the core but full-hard on the surface is a hardenability problem: the section is too thick for the grade, and the answer is to move up the alloy ladder (O1 to A2 to D2) or to use an interrupted-oil schedule on a borderline section [S2]. A part that cracks on quenching is almost always a water-versus-oil mix-up on an oil-hardening grade, or a part that was not pre-heated before the austenitizing step [S4]. Untempered martensite is brittle enough to snap in the hand, so a part that goes straight from quench to service is a different failure path entirely, with no warpage but high snap risk [S3].
When to Pick Each Family
Pick A2 for precision cold-work dies, punches, and gauges that must hold tolerance without a finish grind after heat treat, accepting the need for a furnace and a programmed cycle [S2][S3][S6]. Pick D2 for high-wear, high-chrome applications where some grinding after temper is acceptable and the part benefits from secondary hardening [S7]. Pick O1 for short-run tooling, blades, fixtures, and one-off parts where a torch and an oil drum are the available equipment and a small amount of straightening is tolerable, provided agitation and fixturing are built into the process [S3][S4][S5]. Pick W1 only for parts that genuinely need water quenching (large cross-sections of plain high-carbon steel where deep hardness is required) and only with a pre-heat to avoid the cracking risk that comes with a steep thermal gradient [S4].
Across all four, the heat-treat decision matrix resolves to one operational question: does the shop have a furnace with controlled cooling, or is the quench medium the only available control variable? Furnaces change the answer toward air-hardening grades for every application where dimensional stability is on the drawing; torch-and-bath shops stay on O1 and W1 and live with the warpage penalty that fixturing and agitation can only partially offset. For adjacent decisions on equipment choice and process line layout, the batch vs continuous shakeout for no-bake and green sand lines reference covers a similar controlled-cooling trade-off in a different process family.
Component reference pages worth checking: oil seal, and air pick.
