
An overload relay that lets a motor burn up is misconfigured or mis-sized in roughly nine out of ten field cases, with the remaining failures being open heaters, failed bimetal elements, or a dead solid-state module [S1][S2]. A setting dial turned up to 1.3 on a 0.55 kW ABB AX09 starter, for example, puts the trip threshold well above the motor's locked-rotor heating curve and effectively disables protection [S3].
The diagnostic job is to confirm the relay is actually seeing the motor current, then prove the setting is below the nameplate full-load current (FLC), and only after that condemn the relay itself [S2][S3]. The five-step check described at BRAH Electric sets the order: setting, wiring, enclosure heat, per-phase current, then starting duty and load.
Step 1: Compare Relay Setting to Motor Nameplate FLC
The single most common cause of a non-tripping relay is a current dial set above the motor's nameplate FLC, often because the motor was replaced with a larger frame and the dial was never re-adjusted [S1][S2][S3]. For a standard induction motor, the relay should be set at the nameplate FLC for trip class 10, or at 1.0-1.15 x FLC for class 20/30, with the upper limit chosen so the locked-rotor heating curve is still inside the relay's trip band [S2].
On bimetallic units the dial is a multiplier on the heater current rating, not an absolute ampere value, so the heater must also match the motor frame. A setting of 1.3 on a 0.55 kW motor starter is a textbook example of an over-set dial that lets a winding failure cook the motor before the bimetal bends [S3]. When the relay is a microcomputer-based protection relay, the same principle applies, but the value is entered in amps in the parameter menu, and a wrong CT ratio or wrong parameter map will silently desensitize the unit.
Step 2: Measure Each Phase Current, Not Just One
Single-phase operation is the most common reason a motor draws locked-rotor current yet the relay never registers enough heating to trip: with one phase open upstream, the two remaining windings carry roughly 1.5x the balanced three-phase current, but the average the relay sees can fall inside the trip band if the unit has phase-loss logic and the loss occurred at a particular moment [S2][S4].
Clamp all three motor leads at the starter while the motor runs, compare each reading to the nameplate FLC, and look for a missing phase, a phase reversed against the rotation direction, or a phase with current well above the other two [S2]. A thermal overload relay in a motor protection relay arrangement has no way to flag a 30% imbalance if the average current still sits under the dial, which is why a single ammeter reading is not enough [S4]. When the imbalance exceeds roughly 10%, an electronic or protection relay with explicit phase-loss and phase-imbalance functions will trip on the imbalance long before the thermal element responds.
Step 3: Inspect Wiring, Terminals, and the Heater Path

A loose lug at the relay, contactor, or motor terminal box adds resistance in series with the heater, which both reduces the current the relay actually sees and dumps heat into the surrounding wiring, with the visible result that the relay sits below its dial while the connection glows [S1][S2]. In thermal overload relay bimetallic units, a corroded or under-torqued lug can also act as a partial open, so the relay never gets the full motor current and the dial reading is effectively meaningless.
Pull each of the three line-side and three load-side terminations, look for discoloration, melted insulation, or a smell of overheated PVC, then re-torque to the relay or contactor specification, typically 2.5-4.0 N.m on a small-frame starter.
Step 4: Log Supply Voltage and Confirm It Is Within Spec
The relay may trip for the right reason on a hot afternoon, or it may have been set above nameplate to absorb exactly this, with the result that a true overload never opens the contactor [S3].
Log line-to-line voltage at the starter terminals for at least one full load cycle, and look for excursions below roughly 10% of nominal, the level at which a standard motor starts to draw significantly more current for the same load. A relay sitting on a 480 V system that sees 440 V at the terminals needs to be evaluated against the actual running current, not the nameplate [S3]. On safety relay or relay module based panels, supply sag also resets the logic supply and can latch the trip output, so the symptom of "no trip" can be a brownout latching the contactor open through the safety circuit rather than a relay failure.
Step 5: Confirm the Driven Load Is Not Mechanically Jammed
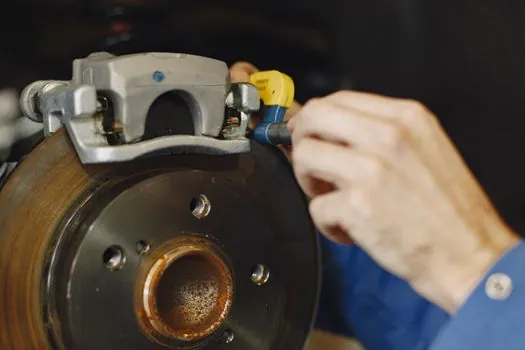
A pump with a clogged impeller, a conveyor with a misaligned idler, a fan with a degraded bearing, or a gearbox that has lost its oil can pull the motor well past nameplate current without any electrical fault, with the consequence that the relay trips as designed but the operator, seeing repeated trips, walks the dial upward and disables the protection [S1][S2]. The diagnostic loop closes by uncoupling the motor and running it no-load, then by checking bearing temperature, vibration, and driven-equipment current trend over a full process cycle.
When the no-load current is at or below nameplate and the loaded current is above, the motor is doing real mechanical work and the relay is doing its job. At that point the fix is on the driven machine, not on the relay. The full trip-class trade-off across Class 10 / 20 / 30 heaters is laid out in this spec-driven comparison and is worth reading before any dial change, because moving from Class 10 to Class 20 will mask a binding load that Class 10 was trying to flag.
When to Replace the Relay Instead of Re-Setting It
Once the setting, wiring, voltage, per-phase current, and load have all been verified clean and the relay still does not trip on a real overload, the relay itself is the failure [S2][S5]. On a bimetallic unit, the common end-of-life modes are an open heater element, a fatigued bimetal that no longer deflects enough to trip the latch, or a worn trip bar that will not move even when the bimetal does its job. The field test is simple: with the motor running and a clamp on all three phases, force a trip by pressing the test button, and confirm the contactor drops out and the relay will not re-energize until reset [S2][S5].
On electronic and microcomputer-based protection units, the equivalent is to inject a test current above the setpoint and verify the trip output and the trip LED both fire, and if either does not, the unit has failed internally and should be replaced rather than bypassed [S1]. Never bypass a tripped relay to keep production moving: a burned 0.55 kW motor in Southeast Asia that the operator repeatedly reset to keep the line running is the failure mode this whole diagnostic chain is designed to prevent [S3].
Track these signals over the next quarter: the spread between motor nameplate FLC and the average relay setting on installed starters (target: setting equal to FLC for Class 10), the percentage of thermal overloads in service that have been replaced by electronic units with explicit phase-loss logic, and the number of motor failures per site per year that are attributed to "the relay didn't trip" versus "the relay was set wrong" [S1][S2][S3].