
Angle grinder pre-use checks follow a fixed three-stage sequence (pre-operation, operation, post-operation) that pairs visual acceptance values with hands-on test points, and that is the same shape used on construction sites, in fabrication shops and on mine maintenance decks [S1][S2].
The risk envelope is wide: an unguarded 125 mm disc on a 1100 W tool routinely runs 10 000 to 12 000 rpm, so a single missed item (cracked disc, missing guard, no RCD on the lead) is enough to turn a routine cut into a recordable injury [S1][S3]. Standard practice is to inspect the tool, the operator, the consumable, and the work area as four separate gates before energising the machine [S2][S4].
Pre-Use Gate 1: Electrical Lead, Plug, and RCD
Inspect the supply lead as the first physical action, because a damaged cable is the most common immediate-disqualification item on a daily angle grinder pre-use sheet [S4]. The pass criteria are: no loose connections at the plug, continuous earth (verify with a continuity or PAT test), no bad joints or splices along the cable, and no cracked or broken insulation visible end to end [S4].
The plug itself must be intact, with all pins present and the cord grip/strain relief holding the outer sheath so that pull on the cable does not transfer to the terminations [S3][S4]. On construction and mine sites the lead must be fed through a residual current device (RCD) rated at 30 mA trip, never through a double adapter or daisy-chained extension, and leads should be elevated off the floor to prevent cut-through [S1]. If any of the four electrical items (loose connection, lost earth, bad joint, cracked insulation) flags, the tool is marked Not In Order and removed from service until repaired and re-tested by a competent person [S4].
Pre-Use Gate 2: Disc, Guard, Spindle, and Brush Wear
Mechanical acceptance is judged against fixed numbers, not impressions: carbon brushes below 5 mm of remaining length are a hard fail and must be replaced as a matched pair to keep wear even between the two brush holders [S3]. The selected disc must match the spindle size and rated rpm of the machine, be free of cracks, warping or edge damage, and the safety flange must be inserted on 9-inch (230 mm) machines before mounting [S3][S4].
Run-out acceptance is qualitative but specific: after mounting, the disc must run true with no visible wobble when spun at no-load, and the guard must be in place, securely attached, and adjusted to the workpiece before the machine is re-started [S2][S3]. Clamping flanges and locking nuts must show no wear, and the spindle lock must engage and release cleanly so the nut can be torqued without slip [S3]. The gearbox should be free of grinding or whining sounds at no-load, and the ventilation slots must be clear of dust; a clogged 125 mm corded grinder will thermally trip the motor within minutes of continuous cut time [S3]. A consistent angle grinder walk-around, run in this order, catches roughly 80% of in-service failures before the tool is energised, based on the cumulative pre-use items listed across construction, shop and mine checklists [S1][S2][S3][S4].
Operator Gate 3: PPE, Switch Type, and Work Area
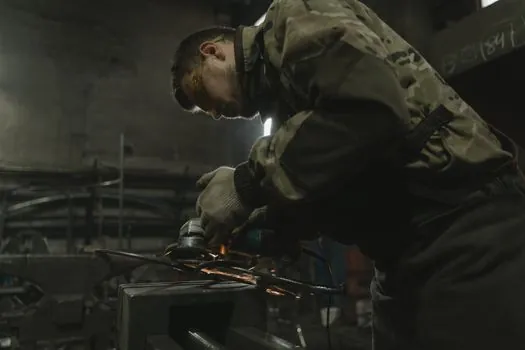
The operator gate is a separate pass/fail checklist that the supervisor must witness, not the tool owner alone, because the failure mode is human, not mechanical [S1][S2]. Required PPE on most sites is a stacked set: safety footwear, protective clothing, eye protection (face shield plus safety glasses for grinding), gloves, face mask, and hearing protection, with a welding mask only when hot-work permits are raised [S1][S2].
The work area must have a fire extinguisher within reach (the mine checklist logs the extinguisher number on the same form), the work piece must be securely clamped, and the operator must identify the ON/OFF switch and confirm it is a no-lock-on (dead-man) type so the disc stops the instant the trigger is released [S2][S3][S4]. Loose clothing, jewellery, long hair, and unsecured beards are excluded from the rotating-disc envelope, and the operator must be trained and authorised for that specific tool class before sign-on [S1][S2]. The SWMS (Safe Work Method Statement) and, where cutting near combustible surfaces is planned, a hot-work permit number, must be recorded against the operator, the shift, and the tool tag on the same pre-use form [S1][S4].
In-Service Checks: Run, Listen, Re-Verify
Once the tool is energised, the checklist switches from visual to behavioural: the disc must run true, hands must stay clear of the work piece and the disc, and the operator must keep both hands on the designated handles (one of which is usually the side handle on a fettling grinder configuration) [S2]. Any unusual noise (grinding, screeching) or excess heat from the motor housing after a few minutes of run is a flag to stop, isolate, and investigate; it is not a "see how it goes" condition [S3].
If the disc binds, the operator must release the trigger and let the disc stop before any clearing action, and the machine must be isolated from the power source before any adjustment, disc change, cleaning, or repair, not just switched off at the trigger [S2]. The guard is re-verified before any restart after a jam, and the disc is re-inspected because a stalled disc can hide a crack that will fail on the next start [S2]. For floor grinder class machines (typically 180 mm and above), the same in-service rules apply but with the additional requirement that the floor surface is checked for nails, rebar, or expansion joints before the run, since these are the dominant disc-failure initiators in that service class.
Post-Use and Servicing Gate: Sign-Off, Storage, and Defect Routing

Post-operation, the tool is switched off before any waste is cleared from the bench, the disc is visually re-inspected for cracks, glazing, or edge rounding before the grinder is stored, and the tool is returned to its designated dry storage with the lead coiled and the guard rotated to a safe transit position [S1][S2]. A common site failure is to put a still-hot grinder into a toolbox; this is acceptable for corded machines but not for cordless packs, which must be removed and stored in their own fire-rated container [S3].
Service inspection runs deeper: housing for cracks and deformation, ventilation slots cleaned, strain relief at cord entry checked for wear, gearbox lubrication reviewed against operating hours, and carbon brushes measured against the 5 mm minimum [S3]. A Pass / Flag / Fail outcome is logged against each of the eight blocks (General Condition, Power Supply and Cord, Motor and Performance, Switch and Controls, Carbon Brushes, Disc and Guard, Spindle Lock, Gearbox), with Flags auto-routing to a corrective action that names the responsible person and the due date, the same accountability pattern used across the digital checklist platforms that publish these procedures [S1][S3].
For procurement and audit purposes, treat the pre-use form as a one-page document with header fields (tool number, tag number, date range, operator surname, hot-work number, fire extinguisher number) and a fixed list of pre-check items; deviations from that template are the first place an auditor or a cross-site safety officer will look, and they correlate with higher rework rates on the tools that pass [S4]. When a grinder fails any electrical or disc item, the cheapest and safest decision is to tag it out and route it to a competent repair shop, not to "Flag and carry on", and the sign-off block on the daily pre-use sheet is the single line that legally transfers accountability for that call from the operator to the supervisor [S3][S4].
Related analysis: Specifying Explosion-Proof Electrical Gear for Upstream, Midstream, and Refinery Service.