Cored wire injection of calcium into the ladle converts solid alumina inclusions into liquid calcium aluminates and improves measured Ca recovery to roughly 25-55%, compared with 5-15% for bulk CaSi lump addition [S4]. The process targets a Ca/Al ratio of 0.10-0.15 in the melt, with wire released 1-2 m below the slag surface to suppress vaporisation of the calcium [S4].
The same paper reports that pure calcium cored wire (97% Ca filler) reaches 35-55% recovery with very-low variability (standard deviation around ±4%), while CaSi cored wire (30% Ca) typically lands in the 25-40% band [S4]. Industrial trials at one ArcelorMittal facility coupled two-phase Euler-Euler flow modelling with the in-house thermodynamic code CEQCSI to match measured Ca yield and inclusion populations before, during and after wire injection [S2].
Why Ca is added in the first place: the Al2O3 nozzle-clogging problem
Al-killed steels form hard, irregular Al2O3 inclusions that cluster, adhere to submerged-entry nozzles during continuous casting, and produce surface defects on rolled products [S5]. Calcium converts those solid alumina inclusions into liquid calcium aluminates (primarily CaO-Al2O3 phases), which float out faster and do not block the tundish nozzle [S1][S5].
The liquid aluminates also accelerate inclusion removal because their ascent velocity in the melt is higher than that of solid particles of the same mass, which shortens ladle refining time and improves steel cleanliness [S5]. In high-carbon hard wire steel, Al2O3 inclusions are also the dominant defect origin in filaments drawn down to about 5 mm diameter, so inclusion modification is a direct product-performance lever [S1].
Corrosion mechanism: a stepwise Al2O3 to CaO transformation
Calcium treatment does not produce a single product. The modification sequence runs through successive calcium aluminate phases: Al2O3 is first converted to CaO·6Al2O3 (CA6), then to CaO·Al2O3 (CA), and finally to 12CaO·7Al2O3 (C12A7) as dissolved Ca builds in the melt [S1]. The later, higher-CaO stage takes roughly six times longer than the early stage at the same inclusion size, and total modification time scales with the square of the inclusion radius [S1].
Diffusion of Al outward through the product layer is the rate-limiting step, not the Ca supply, per a shrinking-core kinetic model validated against laboratory melts [S1]. Industrial fluid-dynamics work adds that boundary-layer mass transfer from Ca vapour bubbles into the liquid steel is the dominant Ca dissolution mechanism once the wire sheath has melted [S3].
Cored wire versus bulk addition: yield, variability and cost compared
Bulk CaSi addition typically returns only 8-15% of added Ca to the steel, with high heat-to-heat variability (standard deviation around ±5%); cored-wire CaSi (30% Ca) lifts that to 25-40% at ±3% scatter, and pure Ca wire (97% Ca) reaches 35-55% at ±4% [S4]. The wire form therefore cuts effective calcium consumption by 60-70% at a typical 0.03% Ca target in steel, dropping unit cost per effective kilogram of Ca to roughly 0.25-0.35x of the bulk baseline [S4].
Feeding accuracy is the second axis. Modern wire feeders hold feed rate within ±1% and release the alloy at a controlled depth, so the Ca/Al ratio can be held in the 0.10-0.15 modification window, whereas bulk lumps float, oxidise at the slag, and produce wide Ca scatter inside a single ladle [S4]. In tests with electrolytic-Ca filler versus silicocalcium filler at the same plant, the electrolytic-Ca wire delivered about 35% lower calcium consumption and a more stable tundish stopper-rod position, indicating fewer nozzle-clogging events [S5].
Process parameters that actually move the yield needle
Wire injection velocity is the operating parameter that operators tune to wire design and bath superheat; too slow and the sheath melts above the slag, too fast and the wire pierces the bottom or releases Ca into cold metal [S3]. Release depth of 1-2 m below the slag surface is the typical industrial target, balancing contact time against Ca vapour loss to argon bubbles [S3][S4].
Ar stirring through bottom porous plugs is what carries the released Ca into the bulk melt and drives inclusion transport to the slag, so gas flowrate and plug configuration are coupled to wire feedrate in any modern ladle model [S2]. The ArcelorMittal-validated simulation work shows that local Ca concentration, local oxygen activity, and mixing time together control whether an inclusion ends up as CA, C12A7 or a partly-modified remnant [S2].
Steels where this makes sense, and steels where it does not
Calcium wire injection pays off in Al-killed grades destined for continuous casting, particularly tyre cord, bridge cable, bearing and linepipe steels, where any solid alumina cluster can break a filament or block a nozzle [S1][S5]. It is also a standard tool for low-sulphur plate grades where CaS control is part of the cleanliness specification [S7].
It is the wrong tool when the steel is Si-killed without Al, when sulphide shape control is not a target, or when the melt cannot accommodate the dissolved Ca window (too low a base Al leaves no Al2O3 to modify, too high a base Al drives excessive Ca demand and risk of reversion) [S1][S2]. Stainless austenitic grades with tight Ti/N specifications are typically handled on different inclusion-engineering routes because Ca can form hard Ca-Ti-oxides instead of liquid aluminates [S2].
Failure modes and what the data shows operators miss
Reversion is the dominant failure: if dissolved Ca drops below the equilibrium Ca/Al ratio at the tundish, modified liquid aluminates re-precipitate as solid Al2O3 on the nozzle wall, and the casting speed has to be cut [S5]. Slow ladle-to-tundish transfer, low superheat, and excessive argon rinsing in the tundish all push the system toward reversion, which is why the Ca/Al target window of 0.10-0.15 is tighter than the wire feed numbers alone suggest [S4][S5].
Second, high-CaO inclusions (C12A7 and beyond) are themselves hard and can act as new defect initiators if the operator over-adds Ca chasing full liquid-phase conversion, so the kinetic model warns that the last 20% of modification costs more time and more Ca than the first 80% [S1]. Operators reading only the heat-average Ca number miss this, and that is why ladle samples pulled at 2-3 minute intervals during wire feed, not just before and after, are the only reliable witness of what really happened in the bath [S2][S3].
Equipment and supply chain context
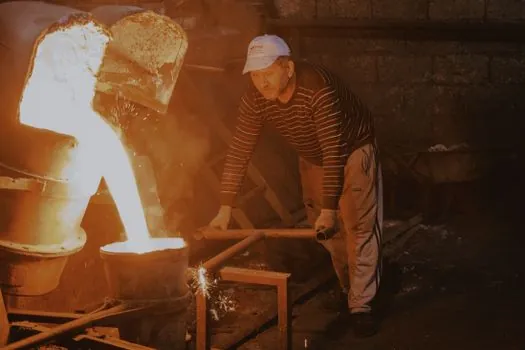
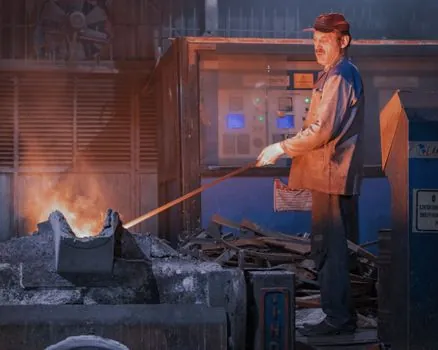
Industrial ladle stations running calcium wire typically pair a high-speed vertical wire feeder (3-6 m/s typical), a cored wire spool of 9-13 mm diameter CaSi or pure-Ca core inside a low-carbon steel sheath, and an argon bottom-purge system controlled through a casting ladle gas-train [S3][S4]. The wire itself falls through a refractory guide tube at the ladle lip, so the consumable is sized to the ladle freeboard and the treatment bay crane clearance [S3].
For plants specifying the upstream wire rod feeding the drawing lines that consume this clean steel, the cleanliness window targeted by Ca treatment directly governs the maximum allowable inclusion size in the billet, typically expressed as a maximum field count at a given rating on standard inclusion charts.
Trackable signals to watch through Q4 2026 are: (a) electrolytic-Ca wire displacing CaSi wire in the 30% Ca segment, driven by the 35% lower Ca consumption per ton reported in industrial tests [S5]; (b) tighter Ca/Al ratio windows (0.10-0.13 instead of 0.10-0.15) being specified in linepipe and tyre-cord QA packages as ladle models mature; and (c) growing coupling of wire-feed controls to in-line draw-wire sensor data on casting speed as a real-time reversion alarm [S3][S4].
See also our earlier report, Ball Valve Datasheet Parameters for High-Pressure Gas Service.