A demolition hammer is a heavy impact tool, and field preparation is the difference between a productive first shift and a seized piston by hour 50. The 1700 W, 230 V/50 Hz corded class of breakers (for example, the Tolsen 88553) typically arrives requiring a single mechanical step: positioning the auxiliary handle around the cylinder case before any bit is fitted [S3].
Beyond handle fitment, the installer is responsible for cord integrity, GFCI protection on damp sites, personal protective equipment, and a defined lubrication interval, with Milwaukee specifying hammer-assembly regrease after every 20 hours of operation [S4]. The steps below are written for a process or site engineer commissioning a new unit on a concrete or masonry job.
Unboxing, Visual Inspection, and Pre-Power Checks
Before any cord is plugged in, the installer should confirm the nameplate voltage matches the supply (230 V at 50 Hz on the 88553 class), the auxiliary handle is present, the bit retainer/chuck is clean, and the case shows no transit cracks [S3]. Tolsen's 88553 documentation explicitly limits on-site assembly to handle positioning, which is a deliberate design choice: a heavy breaker with no small parts to misplace survives the jobsite better [S3].
Cord inspection is the single most overlooked step. The 88553 manual calls out four cord rules in order: never carry or pull the tool by the cord, never yank to unplug, keep the cord away from heat, oil, and sharp edges, and use only an outdoor-rated extension cord when working outside [S3]. A nicked outer jacket on a 1700 W inductive load is an open invitation to a ground-fault event the first time the tool hits a wet slab.
On damp locations where operation cannot be avoided, the supply must come from a Ground Fault Circuit Interrupter (GFCI) protected outlet, per the same manufacturer guidance [S3]. Skipping this on a basement or tunnel job is the most common spec violation seen during incident reviews.
Auxiliary Handle Mounting and Ergonomic Setup
The auxiliary handle is the only torque-bearing interface the operator has on a demolition hammer, and the 88553 ships with the handle loose so the user can rotate it 360 degrees around the cylinder case for wall, floor, or overhead orientation [S3]. The handle should be locked so the operator can stand with feet planted, knees soft, and grip the handle without wrist deviation greater than roughly 15 degrees; an over-torqued or misaligned handle transmits the percussive recoil straight into the elbow joint.
Two-handed control is non-negotiable on a tool in this class. The 88553 manual keeps a persistent safety theme: stay alert, keep proper footing and balance, and never overreach [S3]. For trench or formwork applications where footing is uneven, the same two-handed rule applies, and a related air-tool category discussion, Air Impact Wrench Sizing for Plumbing Installation: A Spec-Driven Selection Guide, covers matching tool mass to operator stance on similar impact loads.
Eye, hearing, and respiratory protection are required from first trigger pull. The Tolsen manual specifies ANSI-approved eye protection and NIOSH-approved respiratory protection matched to the dust hazard in the work area [S3], and these ratings are not generic: silica dust from concrete demolition is a regulated respirable crystalline silica exposure, which puts the NIOSH N95 class or better into the minimum kit.
Bit Installation, Retention, and Tool-Free Chuck Systems
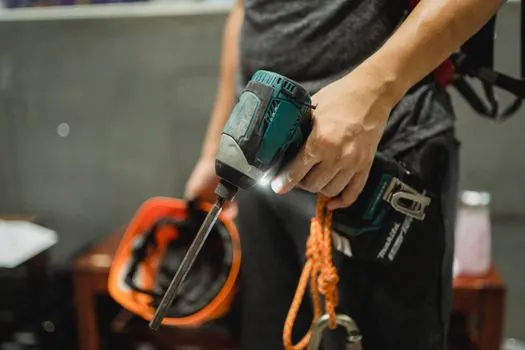
Bit installation on most modern demolition hammers is a single-action sleeve pull, not a wrench turn. On the Makita HM0810T platform, the operator pulls the change ring down to its full travel, inserts the bit into the tool holder until it bottoms, then releases the ring; the internal locking mechanism captures the bit shank [S2]. Forcing a bit against a partially retracted ring is the most common cause of a stuck shank on the first day of service.
On the Milwaukee demolition hammer line, the unit is factory-lubricated, and the hammer assembly is due for relube every 20 operating hours [S4]. Twenty hours is roughly two to three working days on a typical chipping schedule, so a daily grease-point check during the first week is realistic.
Bit selection must match the shank style of the chuck; SDS hex, 1-1/8 inch hex, and 28 mm hex are not interchangeable without a sleeve adapter, and adapters change the percussive energy transfer. For a deeper primer on what separates a demolition hammer from a rotary hammer in the same voltage class, the demolition hammer reference page lays out the impact-energy and bpm range that drives this bit-matching decision.
Power, Cord, and GFCI Requirements on First Energizing
At 1700 W draw, the 88553 sits in a band where a 16 A outlet and 1.5 mm squared cord is acceptable for short runs, but extension cords longer than about 15 m should step up to 2.5 mm squared to hold voltage drop under 5 percent at full load [S3]. Under-voltage at the tool causes the motor to draw higher current, which trips the breaker or, worse, cooks the field windings over a long shift.
Before the first trigger pull, the trigger must be verified in the off position, the cord strain relief seated, and the outlet confirmed grounded. The 88553 manual's electrical safety rules state, verbatim, that the power tool plug must match the outlet, the plug must never be modified, and no adapter plugs are permitted on a grounded tool [S3]. Bypassing the ground pin on a 1700 W double-insulated-looking-but-actually-grounded breaker is the single fastest way to turn a minor chuck seizure into a serious electric-shock incident.
For a site with mixed 110 V and 230 V receptacles, the voltage check is non-optional. Nameplate verification takes ten seconds and prevents a motor burn-up that takes three days to source a replacement.
First-Shift Operating Test and Acceptance Criteria

Acceptance for a newly installed demolition hammer is a short, structured test, not a full production day. With the bit installed, the operator runs the tool for 60 seconds on a sacrificial concrete block at three trigger positions: idle, half-throttle, and full throttle. The acceptance criteria are: (1) no abnormal mechanical noise from the gear case, which would indicate a shipping shift; (2) the bit retracts cleanly on idle, with no sticking, which confirms proper bit seating; (3) the auxiliary handle shows no slip under recoil, which confirms correct torque on the clamp ring [S3].
Lubrication check at first shutdown: the grease points on the hammer assembly should be exercised per the manufacturer's relube schedule, which on the Milwaukee platform is 20 hours of operation [S4]. Running the first hour at no-load, then greasing before resuming production, is a conservative pattern that surfaces assembly problems before the tool is committed to a concrete pour or a wall opening.
A common acceptance failure is a bit that climbs out of the chuck under recoil. Per the Makita HM0810T procedure, the change ring must be pulled fully down and the bit inserted until the locking mechanism engages [S2]. A bit that is not fully captured will be ejected within minutes, and the resulting shrapnel risk near the operator's lower legs is the reason no one should stand in line with the bit axis during the first 30 seconds of test.
Lubrication, Bit Wear, and Preventive Swap-Out Intervals
Grease is the consumable that determines whether a demolition hammer reaches 1,000 hours or fails at 200. Milwaukee schedules hammer-assembly relube after every 20 hours of operation, with the unit factory-lubricated from the factory [S4]. Tolsen's 88553 manual mirrors that pattern, calling out the same 20-hour interval as a hard checkpoint. Under that schedule, a single-shift operator greases weekly; a two-shift operator greases twice weekly, and the grease point should be wiped clean before the new grease is pumped in to avoid a paste buildup of old and new lubricant.
Bit wear is the second leading driver of downtime. A pointed chisel that has mushroomed more than about 2 mm at the striking face, or a flat chisel that has lost more than roughly 5 mm of original width, should be dressed or replaced; a mushroomed bit transmits impact energy back into the piston instead of into the concrete, accelerating hammer wear. Bit dressing with a hand grinder is acceptable, but any bit with cracks or heat-discolored zones is a discard.
Carbon brush inspection on brushed motor platforms is a 200-hour task. On 1700 W class units, the brush access cover typically takes a single screwdriver to remove, and brushes shorter than about 6 mm should be replaced in pairs. Brushes replaced one at a time will lead to uneven commutation and premature armature damage.
Common Installation Mistakes and When to Stop the Job

Four installation errors account for the bulk of early-life demolition hammer failures. First, no GFCI on a damp site: the 88553 manual is explicit that operation in damp locations requires a GFCI supply [S3]. Second, modified plugs or cheater adapters on a grounded tool, which defeat the safety ground and violate the manual's first electrical-safety rule [S3]. Third, skipping the relube at 20 hours, which is the single interval that determines long-term piston health [S4]. Fourth, an improperly seated bit: a bit that is not fully captured in the change ring is a near-certain ejection hazard, and the operator should re-seat per the HM0810T-style pull-ring-insert-release procedure [S2].
There is a point at which the right answer is not to install the tool at all. Any unit with a cracked cylinder case, a cord with exposed inner conductor, a chuck that will not hold a bit under hand test, or a nameplate mismatch (for example, 110 V on a 230 V site) is a reject, not a repair. Send it back, source a replacement, and document the rejection against the receiving inspection checklist.
For comparison, an air-driven demolition tool in the same impact class sidesteps the electrical hazards entirely but adds a compressor and hose management burden; the trade-off is covered on the rotary hammer reference, which compares the electric and pneumatic decision space for heavy chipping. Where steel cutting or stud removal is the next task in the work package, the related selection map at Stud Welder Picks for Demolition and Heavy Steel Cutting Jobs covers the adjacent tooling set.
First 20 hours are the make-or-break window for a demolition hammer. Run the test sequence, respect the 20-hour grease interval, and treat any nameplate or ground-pin deviation as a stop-work item. A tracked signal worth watching is whether sites begin to mandate factory-pre-greased bits as a ship-with option, since that would shift the first relube from a 20-hour task to a 50- to 100-hour task and reduce commissioning labor on multi-unit mobilizations.
Spec-level background on the components involved: linear guide.