One integrated illuminated pushbutton, two separate cutouts: that is the choice on most 22 mm control panels, and the deciding factors are mechanical envelope, lamp-circuit voltage, and how often the lamp versus the contact gets replaced [S4][S1].
Both topologies share the same 22 mm mounting hole standard and the same IEC 60073 color rules, so the front of the panel looks identical either way. The differences sit behind the bezel: one device versus two, one wiring harness versus two, and one part number on the bill of materials versus two [S3][S1].
What an illuminated pushbutton actually contains
An illuminated pushbutton is a single mechanical assembly that holds a contact block and a lamp element behind one colored lens-cap, so pressing the cap and seeing its color are produced by the same device [S2]. Standard control voltages across major lines are 24 V DC, 24 V AC, and 120 V AC, with transformer-style versions stepping a higher AC control voltage down to a lamp-appropriate level [S2][S5]. ABB documents its compact illuminated pushbutton family inside the same modular/compact pilot-device catalog that covers standard pushbuttons and pilot lights, and the front-of-panel design is held consistent across the range so illuminated and non-illuminated heads match visually when mixed [S1].
The lamp and the contact inside an illuminated pushbutton are two independent electrical circuits that share a housing, which is why wiring diagrams always show four terminals (or two contact plus two lamp) rather than two [S6]. Mechanically, the contact blocks on mainstream 22 mm lines use a self-cleaning wiping action: the moving contact rolls and slides sideways against the fixed contact on each operation, which preserves continuity on seldom-actuated circuits such as reset or test commands [S1].
What a separate pushbutton plus pilot light gives you
Two cutouts, two devices, two part numbers: a non-illuminated pushbutton carrying only the contact circuit, and a pilot light carrying only the lamp circuit [S1][S6]. A pilot light is a signaling device with no maintained operator input, intended to show machine state (run, fault, valve open) rather than to accept a press [S6].
Separating the two functions decouples their electrical supplies, so a 24 V DC contact coil and a 120 V AC lamp feed can be wired from different sources without sharing a common behind-the-panel cavity [S2]. It also decouples their replacement cycles: a pilot lamp that has reached end of life can be swapped from the front without disturbing the contact block on the adjacent pushbutton, and the contact block on a high-cycle jog button can be replaced without pulling the lamp out of service [S6][S1]. The same IEC 60073 color coding applies to both devices, so a green pilot light and a green illuminated pushbutton cap carry the same meaning to the operator [S3].
Decision criteria: space, voltage, and maintenance
Panel cutout count is the first hard constraint. A 22 mm illuminated pushbutton occupies one hole; the equivalent separate build occupies two holes spaced at the manufacturer-specified minimum center-to-center distance, which for compact 22 mm lines is typically 30 mm horizontal and vertical [S1]. On a dense HMI plate, two holes can be the difference between fitting a 4th column of controls or not.
Supply voltage is the second constraint. Illuminated pushbuttons stocked as catalog items are commonly wound for 24 V DC, 24 V AC, or 120 V AC, and transformer-equipped units let a 120/240 V AC control circuit drive a low-voltage lamp without an external step-down [S2][S5]. If the panel needs a lamp voltage that the illuminated device does not offer as a standard winding, the separate-pilot-light route lets the engineer pick a pilot light with the exact supply needed (for example 230 V AC neon or a specific DC rail) without being constrained by what the pushbutton supplier stocks in illuminated form [S2].
Maintenance access is the third. On food-and-beverage or washdown lines, IP67 and IP69K front-of-panel ratings are commonly required; ABB's entire compact range and selected modular devices carry both ratings, with IP69K covering high-pressure, high-temperature spraydown that plain IP67 does not [S1]. With two separate devices, the operator can replace a failed lamp from the front without breaking the seal on the command circuit; with one illuminated pushbutton, the same service action may require withdrawing the whole assembly if the lamp is not a front-access cartridge [S6].
Comparison: illuminated pushbutton vs separate pushbutton + pilot light
Across the three criteria that drive most panel builds, the topologies line up as follows. Panel cutouts: 1 for the illuminated device, 2 for the separate build at the same 22 mm head size [S1]. Wiring: one shared housing with two independent circuits (contact and lamp) for the illuminated unit; two separate devices on two independent circuits for the split build, which simplifies mixed-voltage panels [S2][S6]. Maintenance: separate devices allow lamp-only or contact-only front replacement, while illuminated pushbutton service typically pulls the whole head [S6]. Front-of-panel consistency: identical when both devices come from the same 22 mm family, because the bezel and lens-cap geometries are matched across pushbutton, illuminated pushbutton, and pilot light lines [S1].
For a 24 V DC control panel with plenty of panel real estate and separate lamp feeds per state, the separate-pushbutton-plus-pilot-light layout is the lower-risk option: it isolates failures, accepts any lamp voltage, and lets maintenance touch one circuit at a time. For a compact operator station where every hole counts and the contact and lamp share a 24 V DC supply, an illuminated pushbutton is the cleaner build: one cutout, one part number, one consistent bezel.
Color and operator-meaning rules that apply to both
IEC 60073 governs the color coding for both pushbutton actuators and pilot-light lenses, and the same rules apply whether the device is an integrated illuminated pushbutton or a separate pilot light [S3]. Emergency stop and emergency off actuators must be RED, with a permitted exception only if red is genuinely unavailable; start/on actuators are WHITE, GREY, or BLACK with WHITE preferred, and GREEN is permitted but RED is forbidden for start [S3]. Stop/off actuators are WHITE, GREY, or BLACK with BLACK preferred, and GREEN is forbidden [S3].
RESET actuators that double as protection-relay reset must be BLUE, WHITE, GREY, or BLACK, except where the reset action is also a stop, in which case the stop color rules override [S3]. Type A and Type B illuminated actuators are also defined: Type A keeps the same color whether the lamp is on or off (typically the cap is colored and the lamp simply lights it), while Type B uses one color when off and a different color when lit, which is the standard way to indicate a confirmed-active state versus a press-to-arm state [S2]. These rules do not change between the two topologies; the only thing that changes is which device carries the lamp.
When the illuminated pushbutton is the wrong choice
An illuminated pushbutton is the wrong pick when the lamp voltage is not available as a standard winding on the chosen series, when the panel needs a maintained pilot signal driven from a different supply than the contact circuit, or when lamp replacement frequency is expected to be much higher than contact replacement frequency [S2][S6]. It is also the wrong pick when the application requires a separate, lockable disconnect for the lamp circuit, which a single integrated device cannot provide without an external relay or fuse block.
A separate pushbutton and pilot light build is the wrong pick when the panel is space-constrained, when the operator expects to see confirmation at the exact press point, or when the bill of materials and wiring time have to be minimized for a high-volume build [S1][S4]. For dense HMI plates where every column of 22 mm holes costs real estate, doubling the cutout count to gain independent supply rails is usually the more expensive trade.
Specification checklist before committing to either topology
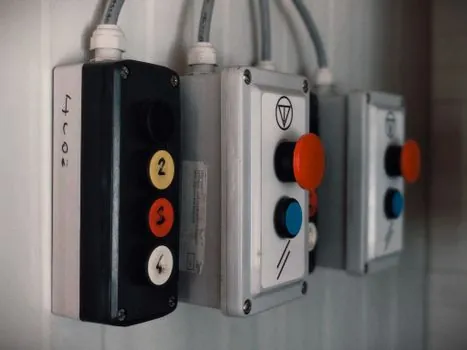
Lock the cutout diameter (22 mm is the de-facto industrial standard in this category), the panel thickness range, the bezel style, and the rear clearance for the contact block plus the lamp block before choosing the topology [S1][S4]. Record the contact arrangement (1 NO, 1 NC, 2 NO, or 1 NO/1 NC) and the lamp supply voltage as separate fields on the drawing, because the contact rating (commonly 10 A at 600 V AC on industrial 22 mm lines) and the lamp current are not interchangeable [S2].
Confirm the environmental rating required: IP20 is sufficient for an interior cabinet, IP65 for general factory washdown, and IP67 plus IP69K for food-and-beverage or outdoor lines where high-pressure hot spray is expected [S1]. Specify the lamp type (incandescent, neon, or LED) and the LED color, because LED is now the default on most modern illuminated-pushbutton and pilot-light lines, and LED polarity matters on DC supplies [S2]. Finally, pull the IEC 60073 color assignment for each function into the drawing legend so the panel builder and the operator see the same color for the same function across the whole machine [S3].
Once those fields are fixed, the topology choice is mechanical: one cutout or two. If a later field change forces a different lamp voltage, expect to revisit the topology choice as well, because that is the field that drives the integrated-versus-separate decision more than any other.
The underlying component specifications are covered under pushbutton pilot light, lamps and light fittings, and construction machinery and equipment.
This topic is covered further in Dynamic Balancing Instrument Resolution: g·mm Thresholds and What Drives Them.