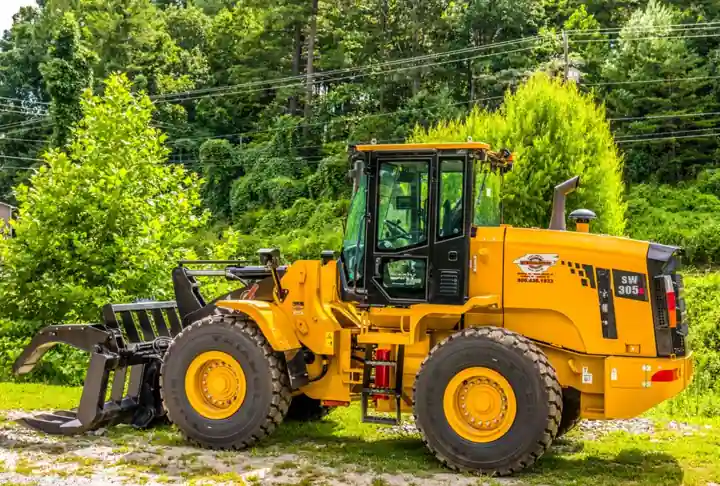
A correct skid steer install is a commissioning job, not a "park and hand over the keys" event: operators who skip the pre-delivery checks account for the majority of first-day hydraulic and attachment faults recorded by rental fleets [S1]. The eight-step flow below reflects the quick-start sequence JCB publishes for its small-platform skid steer line, cross-referenced with BigRentz's 2026 operator-prep checklist.
Three control patterns dominate the installed base: ISO (joystick, left=drive/right=lift), H-pattern (hand levers + foot pedals), and pilot (hydraulic servo joysticks). The machine arrives from the factory set to one of these; switching to another on modern units is a cab-menu change, but the operator must verify the active pattern before any work begins, per the BigRentz operation guide [S1].
Step 1, Pre-Delivery Walk-Around and Serial Verification
The Bobcat service digital manual (part 6556619PDF) is locked to a specific model and serial number, which is why dealers key every installation step to that SN before any work begins [S3]. Walk-around scope: tire or track pressure (typically 4.0-6.0 bar for pneumatic skid steer tires, exact value on the data plate), hydraulic oil level at the sight glass with arms lowered, coolant level, fuel, and a visual check for transport damage to the lift arm pins, quick-coupler wedge, and ROPS structure.
Confirm the machine's rated operating capacity (ROC) on the data plate against the heaviest attachment that will be fitted on day one. Overloading at install is the most common root cause of early hydraulic-cylinder failures, because the new operator is still learning the controls and the lift circuit has not been bled [S1].
Step 2, Cab Entry, Seat Belt, and ROPS Audit
ISO 3471 governs ROPS (rollover protective structure) performance on skid steers; the structure is part of the machine, not an accessory, and must be inspected for cracks, missing bolts, or field-welded repairs before any seat belt is buckled. Lower the lap bar, insert the key, and cycle the parking-brake interlock: the engine should refuse to crank, or the lift/auxiliary hydraulics should remain dead, until the bar is down and the operator is seated with belt fastened [S1].
Operators commonly disable the lap-bar interlock with a jumper for convenience. This is a documented safety violation on every modern skid steer in production and is the single most-cited cause of operator-fatality investigations; the install must include a functional test of the interlock before sign-off.
Step 3, Hydraulic Quick-Connect and Attachment Setup

The quick-coupler wedge is the mechanical handshake between machine and attachment. With the engine off, release wedge pressure via the auxiliary-hydraulic bleed, then drive the cutting edge into the attachment's lower hook, tilt the coupler back to engage the upper pin, and visually confirm full engagement of the safety latch. A half-engaged wedge will pop free under load and is the most common cause of attachment drops on first day of service [S1][S2].
Connect auxiliary hydraulic lines only after the mechanical lock is verified. Male tips and female couplings should be wiped, then paired by function (typically 1=lift/tilt, 2=auxiliary forward, 3=auxiliary reverse, 4=drain). Cross-connecting a high-flow auger line into the lift circuit is a frequent install error that produces uncontrollable lift drift.
Step 4, Control Pattern Verification and Cab Familiarization
ISO pattern: left joystick controls machine travel (forward/reverse on the Y-axis, left/right on the X-axis), right joystick controls lift (push = raise) and bucket tilt (pull = curl). This pattern ships on Bobcat S650/S76/T770, John Deere 324G/330G, CAT 262D3/289D3, Kubota SSV75, and Case SV340 [S1].
H-pattern (legacy): two hand levers drive and steer, two foot pedals run lift and tilt. Still found on older Bobcat 743/753 and older New Holland units. Pilot controls replace the mechanical cables with hydraulic servo signals, cutting operator effort; cab menu switching between patterns is supported on most post-2015 ISO machines. The handover checklist must record which pattern is active, because a returning operator who trained on H-pattern and lands in ISO will reverse the bucket the first time they pull the right stick [S1].
Step 5, Engine Start, Warm-Up, and Hydraulic Bleed
With the lap bar down and seat belt fastened, key on, glow plug cycle for diesel (typical 5-10 s in cold ambient), crank. Idle for 3-5 minutes before any lift function; the hydraulic oil must reach a minimum of approximately 30-40 C for the charge pump to maintain working pressure, and cold-oil operation is the documented cause of jerky pilot control response on first shift [S2].
Cycle lift and tilt through full travel 5-10 times, then hold lift at top of stroke for 30 s and watch for cylinder drift. Drift greater than roughly 25 mm in 30 s on a warm machine points to a leaking hold valve that must be addressed before handover, not after.
Step 6, Work Area and Site Setup
Skid steers pivot by skidding the tires, so the work area must be checked for ground bearing pressure. A small-platform skid steer at full ROC can exert 80-100 kPa on the tire contact patch, and a half-loaded bucket swung at speed will tip a unit on soft ground far sooner than the same load on asphalt. Slope limit for travel is typically 15 degrees loaded, 20-25 degrees empty, exact value on the operator's manual decal [S1].
Overhead clearance is the second site-setup check. With lift arms fully raised, a 1.8 m ROC skid steer stands roughly 3.5-4.0 m at the bucket pin; a low-bay door or service canopy can shear a raised bucket, which then snaps a lift-arm hydraulic line. Walk the route, then walk it again with the operator before the first production cycle.
Step 7, Acceptance Test and Operator Handover

A clean handover is a five-point test: (1) cold start, (2) full hydraulic cycle with no drift, (3) attachment engage/disengage under load, (4) emergency stop and parking brake, (5) control pattern lock. Each point is signed and dated, and a copy goes into the machine file alongside the SN-locked service manual [S3].
For fleet buyers standardising on joystick units, the skid steer loader reference page lists the model code patterns and ROC bands that simplify multi-site rollout. Operators moving from a compact track loader or a backhoe should be flagged for a 30-minute familiarisation shift before solo work, because lever mapping and pedal feel differ across machine classes; a structured field guide is available in Backhoe Loader Installation: Tractor-Mount vs OEM Frame Field Guide for crews who run mixed fleets.
Step 8, Documentation, Training Records, and 50-Hour First Service
First service is at 50 operating hours, not at 100 like legacy diesels, because the hydraulic oil and charge filter carry the highest contamination load in the first 50 hours. Log the install handover, the operator's training certificate, and the serial-number-locked service manual in one folder, and schedule the first service before the unit is released to production [S3].
Track one signal after install: lift-arm drift after warm-up. Any measurable drift on a 50-hour unit points to a hold-valve issue and should be escalated to the dealer before the warranty window closes. Crews who already manage hydraulic plumbing on quick-hitch frames will recognise the same bleed-and-test sequence covered in Excavator Installation: Quick-Hitch Plumbing, Track Fitting, and Site Setup, which carries over directly to skid steer quick-coupler work.
Spec-level background on the components involved: linear guide, and crossed roller guide.