
Tower crane commissioning is the gate between erection and first lift, requiring a preventative inspection, maintenance and testing program to ensure the crane is safe to use before it handles any production load [S2].
The scope covers the structural, mechanical, electrical, and safety subsystems in that order, and every step must be recorded against the manufacturer's checklist, because a missed limit switch or a slack slewing brake will not show up in a paperwork review later [S1][S2]. For the broader equipment context, see the construction machinery and equipment reference page.
Stage 1: pre-erection NDT and structural inspection
Structural NDT on a tower crane must cover mast sections, slewing ring, pinion, jib chords, and tie-rods before the unit stands up, and the Ontario construction-project guideline lists five accepted methods: eddy current, magnetic particle, liquid penetrant, radiographic, and ultrasonic testing [S5]. A tower crane is not a lamps and light fittings commodity, it is a welded-steel structure where a single undetected toe crack in a chord weld becomes a collapse initiator under a 12 t tip load.
The competent person walks the mast looking for bent chords, missing high-strength bolts, weld rework, and corrosion pitting; any section showing cracks, deformed flanges, or loose pins is rejected and quarantined, not "watched" [S2][S6]. Anchor bolts set in the concrete pad are torque-verified to the manufacturer value, typically with a calibrated hydraulic wrench, because base fixation sets the moment envelope for every later lift [S4].
Stage 2: no-load function and motion checks
No-load testing verifies that every motion runs smoothly in both directions, with brakes holding the load, limits tripping at the correct set-points, and no abnormal noise from the slewing ring or hoisting gearbox [S3]. The slewing unit must rotate the full 360 degrees without binding, the trolley must traverse the jib to both ends, and the hoist must lift and lower with a controlled stop, no overshoot, no drift [S4].
Emergency stops, power-off braking, anti-two-block devices, and anemometer alarms are all exercised during the no-load pass; any device that does not function as specified is locked out and the crane stays yellow-tagged until repaired [S2]. The control panel is checked for correct phase sequence, correct indicator polarity, and a working cabin alarm, and the operator cab is verified for clear sightlines to the hook, jib tip, and rear counterweight radius [S6].
Stage 3: progressive load testing with certified weights

Load testing is performed in progressive steps: typically 25%, 50%, 75%, 100%, and a static overload at 125% of the rated capacity at the maximum radius, using certified test weights with documented mass and a recent calibration certificate [S3]. Each step is held long enough to check structural deflection against the manufacturer's allowable, listen for wire-rope birdcaging, and confirm the LMI/RCI reading matches the actual load within its stated tolerance [S2].
Wire-rope terminations are inspected under load, looking for slip at wedge sockets, crushed strands at the drum, and heat discoloration on the fast line; brakes are checked for fade by holding the load at mid-radius for the dwell time specified in the manual [S6]. A useful parallel for the field-engineer mindset lives in this backhoe loader pre-trip inspection checklist, which uses the same "walk it, measure it, sign it" cadence adapted for hydraulic equipment.
Stage 4: safety devices, electrical, and LMI/RCI calibration
Load moment indicator (LMI) and rated capacity indicator (RCI) calibration is verified with a certified test weight: lift at known radius, compare indicated vs. actual, and document the deviation; Ontario rules require this verification on every commissioning and after any structural or rope change [S2][S5]. Limit switches (hoist upper/lower, trolley end, slewing end), overload cut-out, and anti-collision zones (if a second crane is on the same site) are each tripped deliberately and reset.
Electrical checks include insulation resistance of power and control circuits, phase-sequence correction on the main isolator, correct grounding of the tower base and cab, and continuity of the grounding conductor back to the site earth [S6]. RCD/ELCB devices on the supply line are tested at their rated trip current; the cabin heater, wiper, and work lights are confirmed, since an operator who cannot see in rain will not report an overload.
Stage 5: documentation, sign-off, and handover

The commissioning report must list every checklist item, the test loads applied, the LMI/RCI deviation readings, the NDT method and result for each component, and the name and credential of the competent person who performed the work [S2][S5]. Without that report, the crane is not commissioned, regardless of how many tests were run verbally on the radio.
Safe Work Australia's inspection checklist for tower cranes is the standard pre-erection and commissioning form for that jurisdiction, and the manufacturer's own checklist takes precedence where it is more stringent [S2]. Replacement parts installed during commissioning must meet the original specification, and any deviation triggers an engineer sign-off, because "similar enough" is not a defensible position on a 50 m freestanding tower [S2].
Comparison: commissioning stage vs. what is verified vs. who signs
Stage 1 (NDT) verifies mast, slewing ring, jib, tie-rods; eddy current, MT, PT, RT, or UT methods; signed by a competent person with NDT qualification [S5]. Stage 2 (no-load) verifies motion, brakes, limits, e-stops; manual observation and multimeter; signed by the erector's lead engineer [S3][S6]. Stage 3 (load test) verifies capacity, deflection, LMI/RCI accuracy at 25-125% steps; certified weights; signed by the competent person with load-test authority [S2][S3]. Stage 4 (safety/electrical) verifies LMI/RCI calibration, insulation, grounding, phase sequence; test instruments with valid calibration; signed jointly by electrical and mechanical competent persons [S5][S6].
Common failure modes caught only at commissioning
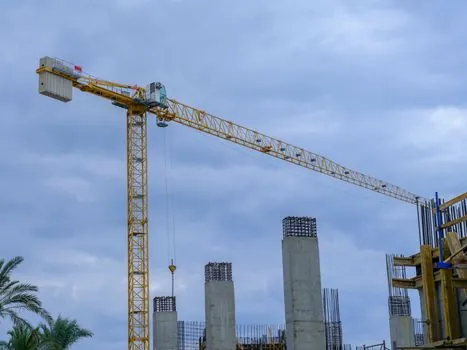
Three problems reliably surface during commissioning but not during visual inspection: incorrect phase sequence that runs the hoist in reverse and bypasses the upper limit, LMI/RCI drift from the last site that reads 8-10% low and would silently over-allow a near-rated lift, and a slewing-ring bolt pre-load that was set with the wrong torque pattern at the yard [S2][S6]. Each is undetectable in a static walk-around and only shows up when the crane is actually asked to do work under load.
The 2024 self-erecting checklist explicitly calls out the emergency-system verification, progressive load test, and the no-load test as the three steps that catch these latent defects, and treats them as non-skippable before any production lift [S3]. The same logic applies to the related construction machinery and equipment class: pre-use checks are not paperwork, they are the only place many wiring and rigging errors become visible.
Standards, jurisdictions, and what to track next
Australian WHS Regulations and the Safe Work Australia crane-inspection guide define the "competent person" and the inspection cadence (routine, annual, and pre-erection/commissioning), and require a written report with each inspection [S2]. Ontario's Construction Projects regulation (O. Reg. 213/91) and the 2024 technical guideline enumerate the five accepted NDT methods and tie the sign-off to a competent person with engineering credentials [S5].
Two trackable signals: confirm whether the next site brings an NDT certificate for every mast section, not just a "visual OK" sticker, and verify the LMI/RCI deviation value is recorded against a specific test weight and radius, not a generic "passed" line. For broader equipment-test context, the tensile testing machine reference page covers the instrumentation side of load verification, and the signal tower light page covers the indicator side used on the cab console.